Tuesday, August 14, 2012

this was supposed to be easier

Jason and I are reading the Game of Thrones series right now (when we're not up to our elbows in paint), and the Stark family motto is "Winter is Coming." If we had a motto, right now it would be "This was supposed to be easier." Or something more poetic, but along the same lines.

By now you'd think that we would expect things will go wrong, but for some reason, we keep getting thrown off when our plans go awry. Like when I realized I broke the plastic tube that connects the fridge's water supply after moving the fridge to paint the wall behind it. Or when we tried reinstalling the blinds. Or when we tried to move the couch and scratched up our nicely painted wall. Or just trying to get painters tape to stick to the wall.

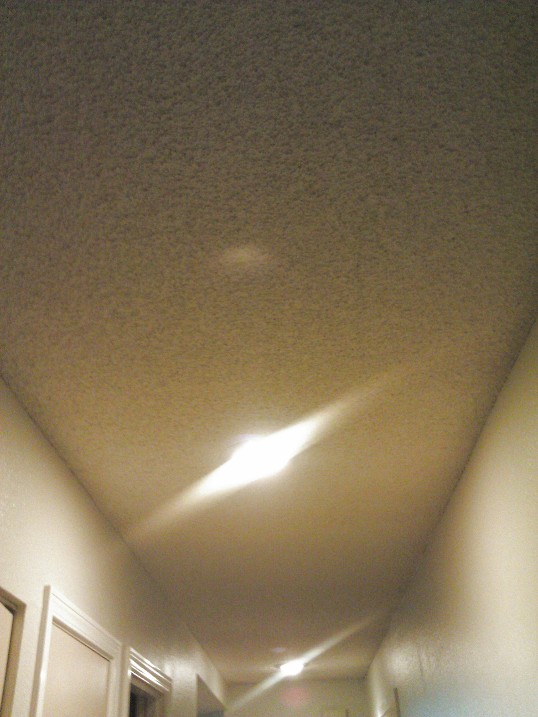
Last week we brought in a contractor to remove our asbestos-free popcorn. The team spent Monday and Tuesday removing the popcorn and Wednesday was spent texturizing and priming. Thursday was supposed to be the last day and the crew spent it painting the ceiling a nice crisp white. However, toward the end of the day on Thursday, we noticed some strange stripes in the ceiling.

The contractor had never seen this before, but it appeared that the mudding compound used on the drywall was showing through the paint (or the paint was brighter on the compound than it was on the drywall). And this was after one coat of primer and two coats of paint.

(Editor's note: We really should have seen this one coming, after we had our light box in the kitchen removed and replaced with recessed lighting we learned that drywall needs more than just one coat of primer and it took us four coats of paint to get the ceiling in the kitchen to look good. Oh well.)

After the contractor called some associates and visted Sherwin Williams' paint experts and Jason did some exhaustive internet research we came to the conclusion that this was likely due to our choice in paint finishes.

We picked satin to go throughout the condo for two main reasons:
  • It's easy to clean but not too shiny
  • We wanted consistency throughout the condo. Some of our walls cross into other rooms - i.e. the kitchen and living room share a wall and it would look weird to have two different finishes on one wall. This way we can have a food fight wherever without worrying about spaghetti sauce staining the wall. 
While satin is great to clean, it shows imperfections more than other flatter finishes. The paint crew came back on Monday and finished up the job with one final coat of flat paint and it looks amazing.

Removing the popcorn was a great investment, right up there with the hardwood floors that are coming in less than a week!

Here's a before an after shot:


Monday, August 6, 2012

adios popcorn!

After a relaxing float on the river with friends this weekend, Jason cracked the whip and we got back to work:

We reorganized the closets in the hall, the master and guest bedrooms for more storage space. We cleared out the kitchen cabinets, took out the shelves and stored everything. We found mold! And removed the mold with lots of bleach. We cleaned the cabinets with TSP and finished painting the kitchen walls. We moved the refrigerator and discovered a spill from many years ago. We cleaned the spill. We took apart the dining room table, bookshelf, and computer desk and stored everything in the closets. We deglossed the cabinets and removed the shelf lining. We moved the furniture from the living room and the dining room into the guest bedroom and the closets.

What do we have now? Empty rooms so that the popcorn ceiling doesn't get on the furniture while it's being removed.

Goodbye popcorn ceiling! The work crew showed up at 7:55 a.m. today and they aren't wasting any time getting started.


Wednesday, August 1, 2012

major progress is happening here!

I don't want to post any progress pictures because we're saving it for a big reveal, but we've been working hard the last couple of weeks and I want to let you in on some of the exciting things we've been up to.
  
Jason and I both have splotches of paint all over and home improvement-induced injuries including cramped hands from holding the screwdriver to sore backs from hunching over while painting the trim. There have been some trying moments (re-installing blinds, I HATE the blinds) and some triumphs (the outlets work! the light switches work! the tile looks good!). While we like to think we're pretty good at this project management business, we're learning that there's always room for improvement. An example of this is the ten trips to Home Depot and Lowe's we've made since Friday (yes, ten trips in six days).

Paint!
We spent last weekend painting the living room, kitchen and master bedroom. We were fortunate enough to have a few friends that worked long hours (thanks Ben and Andres!) which made the work go by much faster and I didn't have to go up on the wobbly 10-foot ladder at all! Add to that the den, hall and dining room and we're getting close to finishing. All that's left is the space behind the refrigerator, the bathrooms and the guest bedroom.

Tiles!
After a power outage on Monday, our tile contractor got a delayed start but they made up time and finished today. The bathrooms are now usable, which means we don't have to go down to my unit every time nature calls. Here's a close-up of our tile selection - you'll have to wait till we're finished painting to see the whole room.

Toilet!
Speaking of nature calling, we had a not-very-fun weekend a month ago when the master bathroom toilet starting leaking. The bolt in the tank had rusted out and needed to be replaced along with the rubber washers. It proved to be a lot more difficult getting the bolt out than we anticipated and we started thinking maybe this 34-year-old toilet should be replaced. So Jason shopped around and asked became well-educated in the power of the flush and the pros and cons of a one-piece toilet. At Home Depot they measure flush power in how many golf balls can go down in one flush. I think the one we ended up with can manage 10 golf balls, not that we'll ever test it.


Did you know Amazon sells toilets? We found the same one from Home Depot for less and with free shipping.

Electrical outlets and light switches!
Jason has become a master electrician replacing out our ugly beige switches with these elegant white decorate switches.

We've invested in a new tool as well which will be delivered on Thursday: an outlet tester. I'm not sure what it does but hopefully it'll help Jason make sure he doesn't electrocute himself.

Popcorn!
When we first starting painting in the living room we realized that the previous owners had painted the popcorn ceiling the same color as the walls. It wasn't noticeable until the beige walls became light gray and the popcorn ceiling stayed beige. Jason and I cursed the ugliness of it, but at 10 feet high, they're beyond our reach and doing anything with them was out of the scope of our renovations.

But we couldn't stop obsessing about how ugly and dirty it was. We figured out our options: 
  1. Do nothing and avoid looking at the ceiling. 
  2. Paint the cursed popcorn white and hope it doesn't get dirty again. 
  3. Bite the bullet and remove the popcorn and then paint the ceiling. 

We looked into what it cost to do the second and third options. The estimates we received for painting the popcorn ranged from $500 to $1250. The high end seemed like a lot for 450 sq ft of popcorn, but we've learned the hard way that you usually get what you pay for. The high ceilings coupled with the prep work of masking our walls and removing the ceiling fan and covering the track lighting weren't helping lower the price.

Our last option was removing the popcorn altogether and painting the ceiling. This was the preferred option because we don't like the look of popcorn ceilings, but before we could even think about that option, we needed to find out if our popcorn had asbestos fibers in it. We found a local company with a fast turn around time (Seattle Asbestos Testing) and followed the instructions on how to collect a sample. I donned a face mask and used some of my recently purchased art supplies to collect the sample (spray bottle to moisten the popcorn and a palette knife to scrape). With sample in hand (in a ziploc baggy) I drove to the lab and $50 and less than an hour later we had the result. 

Not only does this mean Jason hasn't been inhaling asbestos for the last three years but it also means that the cost of removing the popcorn is much less and won't require haz-mat suits. Jason found a few companies who would remove the popcorn, patch the ceiling and paint for not much more than the paint quotes we received. We decided to go for it and will be removing the popcorn in the living room, dining room, den, hallway and master bedroom. So, our apologies to guests because we're not paying for it to be removed in there... sorry!

What's up next? 
Our to do list is still pretty hefty and we're aiming to finish it all before August 20 - the day the hardwood floors are installed. Here's a look at what we're still working on:
  • Cabinets: we've cleaned them and filled their dents and scratches, next up is deglossing, priming and painting
  • Painting: guest bedroom, bathrooms, and the doors (ugh, the doors, all the doors)
  • Hiring a popcorn ceiling remover and getting that junk outta here
Hmmm...writing it down doesn't make it seem like that much but between working and trying to have a little bit of a life, it sounds like a busy next couple of weeks. Once the floors are installed comes the fun part:
  • Rug shopping!
  • Sock races on the hardwood!
  • Maybe creating art for Jason's bare walls - more on this to come soon!
That's it for now, but we'll keep you updated with more exciting things to come soon. Also, get your buiilding materials tested if you're planning on doing any renovations - that asbestos is not good for you, especially when you're doing renovations in and around it. From the EPA: "If asbestos material is more than slightly damaged, or if you are going to make changes in your home that might disturb it, repair or removal by a professional is needed. Before you have your house remodeled, find out whether asbestos materials are present."